Writing OpenHEXA Pipelines
End-to-end guide to authoring OpenHEXA pipelines: @pipeline/@task DAGs, parallelism and timeouts, typed parameters (datasets, files, secrets, connections, dynamic choices), workspace.yaml, GitHub Actions deploys, and Docker runs.
They are written as Python programs, and offer the following capabilities:
- Local development: write your pipelines in your favourite IDE on your laptop before deploying them to the cloud
- IO handling: interact with your OpenHEXA workspace filesystem and database, and connect to external data sources
- Parallel processing: define tasks that can be run in parallel
- Scheduling: schedule your pipeline to be run automatically at a specific interval
The present guide will walk you through the creation and the deployment of an OpenHEXA pipelines. You may also find the following two guides interesting:
- Using the OpenHEXA SDK: the OpenHEXA SDK is a Python library that provides building blocks and helper methods to write code on OpenHEXA
- Using the OpenHEXA CLI: the OpenHEXA CLI is a command-line utility that allows you to interact with your OpenHEXA instance from your terminal
- Using the OpenHEXA Toolbox - DHIS2: Acquire and process data from DHIS2 instances
- Using the OpenHEXA Toolbox - IASO: Fetch data from IASO
- OpenHEXA Client: Typed GraphQL client for the OpenHEXA platform
Quickstart
You can create OpenHEXA two types of pipelines:
- The first one is the simplest one and relies on a Jupyter Notebook
- The second and more complex type requires code to be written in Python and uploaded to the platform using the OpenHEXA CLI
Create a pipeline using a Jupyter Notebook
This is the easiest way to create a pipeline and can be done from the web interface. Once you have written a Jupyter Notebook using the JupyterLab interface of your workspace, go to the pipelines tab and click on "create". Then select the notebook you want to use for the pipeline. Example :
Be aware that this type of pipeline comes with limitations: - You cannot add parameters to the notebook via the run interface. - Jupyter Notebooks are not versioned and must not be moved or deleted since we use the path to the notebook to run the pipeline.
Create a pipeline using the CLI
Requirements
The OpenHEXA SDK requires Python version 3.9 or newer, but it is not yet compatible with Python 3.12 or later versions.
If you want to be able to run pipelines on your machine, you will need Docker.
Your first pipeline
Here's a super minimal example to get you started. First, create a new directory and a virtual environment:
mkdir openhexa-pipelines-tutorial
cd openhexa-pipelines-tutorial
python -m venv venv
source venv/bin/activate
To write an OpenHEXA pipeline, you need to install the OpenHEXA SDK:
For more information, please read the dedicated manual page on the OpenHEXA CLI.
💡 New OpenHEXA SDK versions are released on a regular basis. Don't forget to update your local installations with
pip install --upgradefrom times to times!💡 If you are running OpenHEXA locally, you have to set up the url before creating pipelines:
openhexa config set_url http://localhost:8000
Now that the SDK is installed withing your virtual environment you can use the openhexa CLI utility to interact with the OpenHEXA platform.
Using the OpenHEXA web interface, within a workspace, navigate to the Pipelines tab and click on "Create".
Copy the command displayed in the popup in your terminal:
You will be prompted for an authentication token, you can find it in the popup as well.
In case you have already configured one or more OpenHEXA workspaces before, you can view the configured workspaces using the openhexa workspaces list command, and you can switch to another workspace using the openhexa workspaces activate <workspace> command.
If for some reason you need to update your workspace token, you can run openhexa workspaces add <workspace> again, even if the workspace has already been added, the CLI will prompt you for a token that will replace the previous one.
You can select the default options for the questions asked by the CLI by pressing enter. It is going to create the basic structure of the pipeline and a Github Actions workflow that will push the pipeline to your platform.
Great! As you can see in the console output, the OpenHEXA CLI has created a new directory, which contains the basic structure required for an OpenHEXA pipeline. You can now cd in the new pipeline directory and run the pipeline:
Congratulations! You have successfully run your first pipeline locally.
If you inspect the pipeline.py file, you will see that it doesn't do a lot of things, but it is still a perfectly valid OpenHEXA pipeline.
Once you are satisfied with your pipeline, you can push it to the cloud using the openhexa pipelines push command. It's going to create a pipeline in the web interface, and you will be able to run it from there.
As it is the first time, the CLI will ask you to confirm the creation operation. After confirmation the console will output the link to the pipeline screen in the OpenHEXA interface.
You can now open the link and run the pipeline using the OpenHEXA web interface.
Version control
We recommend using git for version control when working with OpenHEXA pipelines. This will allow you to track changes, collaborate with others, and push your code to the cloud automatically. If you are not familiar with Git, we recommend you read the tutorials from the documentation. You can initialize a new git repository in your pipeline directory:
You can then add your files to the repository and commit them:
If you have a GitHub repository, you can push your code to it:
Deploying pipelines
By using the openhexa init command to create a new pipeline, you will get a .github/workflows directory with a Github Action that will automatically push your pipeline to the OpenHEXA backend when you push to your git repository. 3 modes are available when you create a pipeline using the command: - push (default): the pipeline will be pushed to the OpenHEXA backend - release: the pipeline will be pushed to the OpenHEXA backend and tagged with the release version - manual: the pipeline will be pushed to the OpenHEXA backend only when you run the Github Action manually
In order to use the github action, you need to add the OH_TOKEN secret to your repository. You can find the token in the OpenHEXA web interface in the "Pipelines" tab.
You can also manually push your pipeline to the OpenHEXA backend using the openhexa pipelines push command.
If the default template of the Github Action doesn't suit your needs, you can modify it to fit your requirements. You can also create your own Github Action workflow file in the .github/workflows directory using the example below:
name: push-pipeline

on:
  push:
    branches:
      - main

jobs:
  deploy:
    runs-on: ubuntu-latest

    steps:
      - name: Checkout
        uses: actions/checkout@v2

      - uses: actions/setup-python@v2
        with:
          python-version: '3.11'

      - name: Configure OpenHEXA CLI
        uses: blsq/openhexa-cli-action@v1
        with:
          workspace: "<insert-your-workspace-slug>"
          token: ${{ secrets.OH_TOKEN }}
      - name: Push pipeline to OpenHEXA
        run: |
          openhexa pipelines push . --yes
Repositories with multiple pipelines
The default Github action workflow created with the openhexa init command assumes that the repository contains a single pipeline. Repositories with multiple pipelines in sub-directories can be supported with the following trigger strategy:
The paths: property will ensure that only commits that change files located in the pipeline sub-directory (or the workflow file) will trigger the action. The strategy requires one workflow file per pipeline.
Name pipeline versions automatically
Pipeline version names and URLs can be generated automatically based on the hash of the commit that trigerred the deployment:
      - name: Push pipeline to OpenHEXA
        run: |
          openhexa pipelines push moodle_extract \
            -n ${{ github.sha }} \
            -l "https://github.com/BLSQ/openhexa-pipelines-lifenet/commit/${{ github.sha }}" \
            --yes
Anatomy of an OpenHEXA pipeline
Pipeline directory structure
Let's have a closer look at the resources created by the openhexa pipelines init to get a better understanding of how OpenHEXA pipelines are built. Within the simple_etl directory:
You can see that the following files/directories have been created:
.gitignore: if you use version control, this default ignore file will make sure that you won't push development files to your repository (mostly the content of theworkspacefolder and theworkspace.yamlfile, see belowpipeline.py: the actual pipeline codeworkspace: a directory that you can use to simulate the workspace filesystem that is available onlineworkspace.yaml: the development workspace configuration file - more on this later.github/workflows/push-pipeline.yml: a GitHub Actions workflow that will push the pipeline to the cloud when you commit and push your changes to your repository.
At this point, it is worth mentioning that to have a valid OpenHEXA pipeline, you need:
- A directory for the pipeline (one pipeline by directory)
- A
pipeline.pyPython module (this script can import other modules but the pipeline declaration has to reside in thepipeline.pyfile
For reference, here is an example of a valid workspace.yaml file:
database:
  host: localhost
  username: some_username
  password: some_password
  dbname: the_db_name
  port: 5432
files:
  path: ./workspace
Pipelines and tasks
Let's open the pipeline.py file to see how an OpenHEXA pipeline should be coded.
As you can see, the pipeline doesn't do much at this point:
from openhexa.sdk import current_run, pipeline


@pipeline("simple-etl")
def simple_etl():
    count = task_1()
    task_2(count)


@simple_etl.task
def task_1():
    current_run.log_info("In task 1...")

    return 42


@simple_etl.task
def task_2(count):
    current_run.log_info(f"In task 2... count is {count}")


if __name__ == "__main__":
    simple_etl()
This example is quite basic, but it illustrates how you can coordinate the different steps of your data pipeline.
Each task is evaluated as soon as the pipeline is decorated by the @pipelinedecorator, but the actual task will only be executed when the pipeline is run (in our example, through the simple_etl() call at the bottom of the file).
The return values of each task is stored in a variable at runtime, and can be passed to the next task as a parameter: this is how the task execution dependencies are determined (an OpenHEXA pipeline is actually a Directed Acyclic Graph).
Let's modify our pipeline to illustrate this further. While we're at it, we'll turn this pipeline into something that actually looks like a proper ETL pipeline.
First, let's install a couple of additional libraries in our virtual environment:
Then, adapt pipeline.py as follows:
from time import sleep
import pandas as pd

from openhexa.sdk import current_run, pipeline


@pipeline("simple-etl")
def simple_etl():
    people_data = extract_people_data()
    activity_data = extract_activity_data()
    transformed_data = transform(people_data, activity_data)
    load(transformed_data)


@simple_etl.task
def extract_people_data():
    current_run.log_info("Extracting people data...")
    sleep(2)  # Let's pretend we are querying an external system

    return pd.DataFrame([{"id": 1, "first_name": "Mary", "last_name": "Johnson"},
                         {"id": 2, "first_name": "Peter", "last_name": "Jackson"},
                         {"id": 3, "first_name": "Taylor", "last_name": "Smith"}]).set_index("id")


@simple_etl.task
def extract_activity_data():
    current_run.log_info(f"Extracting activity data...")
    sleep(4)  # Let's pretend we are querying an external system

    return pd.DataFrame([{"id": 1, "person": 1, "activity": "Activity 1"},
                         {"id": 1, "person": 1, "activity": "Activity 1"},
                         {"id": 1, "person": 1, "activity": "Activity 2"},
                         {"id": 1, "person": 1, "activity": "Activity 3"},
                         {"id": 1, "person": 2, "activity": "Activity 2"},
                         {"id": 2, "person": 2, "activity": "Activity 3"},
                         {"id": 2, "person": 3, "activity": "Activity 1"},
                         {"id": 2, "person": 3, "activity": "Activity 2"}]).set_index("id")


@simple_etl.task
def transform(people_data, activity_data):
    current_run.log_info(f"Transforming data...")
    combined_df = activity_data.join(people_data, on="person").reset_index()

    return combined_df


@simple_etl.task
def load(transformed_data):
    current_run.log_info(f"Loading data ({len(transformed_data)} records)")


if __name__ == "__main__":
    simple_etl()
Here is what happens when you run this pipeline:
- The
extract_people_dataandextract_activity_datatasks don't depend on any other task (neither task does take the return value of another task as argument), and they will be both executed immediately, in parallel - The
transformtask depends on the return values ofextract_people_dataandextract_activity_data, and will thus wait for both tasks to complete before running - The
loadtask will be run as soon as thetransformtask has completed
You are free to organize your pipeline and tasks as you see fit, as long as you remember a few key points: - The pipeline function (the one decorated by @pipeline) is used to created the execution graph of the pipeline - The tasks (decorated by @simple_etl.task) are the actual units of work, this is where the data processing should happen - ⚠️ You shouldn't perform data processing in the pipeline function - it should only be used to orchestrate tasks - Tasks can return values, as long as those values can be pickled - As illustrated above, a task can take the return value of another task as an argument, as long as it is provided as an individual argument, not in a list or in a dictionary (in our example count, returned by task_1 is a valid argument for task_2, but {"count": count}or [count] would not work) - You can't use task return values in your main pipeline function (the one decorated with @pipeline): task return values are proxies, and will only be resolved to their actual values within another task
Pipeline timeouts
All pipelines will time out after a specific duration. When a pipeline times out, the underlying Python process will be killed. The exact duration depends on the configuration of your OpenHEXA instance. The standard default timeout is 4 hours, expressed in seconds.
You can chose the timeout for your pipeline using the timeout parameter of the @pipeline decorator, up to the maximum allowed by your OpenHEXA instance configuration. The standard maximum allowed value for timeouts is 12 hours, expressed in seconds.
Here is an example of a pipeline configured to time out after 12 hours:
from openhexa.sdk import current_run, pipeline


@pipeline("timeout-example", timeout=43200) # 12 * 60 * 60
def timeout_example():
    a_task()

@simple_etl.task
def a_task():
    # data processing code goes here
Input/Output
Most data pipelines performs some kind of IO or another. The OpenHEXA SDK offers a few utilities that will help you:
- Read and write files from/to the workspace filesystem
- Interact with the workspace databases
- Connect to external systems
Reading and writing files
As OpenHEXA pipelines are deployed in a workspace, the OpenHEXA SDK offers a simple shortcut that will help you work with workspaces files: the workspace.files_path property.
The following section will illustrate how to use it in a pipeline, for more information about the workspace filesystem, please refer to the Reading and writing files section of the SDK documentation.
Let's adapt our pipeline so that it:
- reads the activity list from a file in the workspace
- write the transformed data to the workspace filesystem
- informs the OpenHEXA backend that the transformed data is part of the pipeline output
When running the pipeline online, within a workspace, your pipeline will use the actual workspace filesystem.
But during development, we will simulate the workspace filesystem by creating a activities.json file in the workspace directory created next to your pipeline.py file when you ran openhexa pipelines init earlier.
You can use the following command to create the activities.json file:
echo '{"activities":[{"id":1,"person":1,"activity":"Activity 1"},{"id":1,"person":1,"activity":"Activity 1"},{"id":1,"person":1,"activity":"Activity 2"},{"id":1,"person":1,"activity":"Activity 3"},{"id":1,"person":2,"activity":"Activity 2"},{"id":2,"person":2,"activity":"Activity 3"},{"id":2,"person":3,"activity":"Activity 1"},{"id":2,"person":3,"activity":"Activity 2"}]}' > workspace/activities.json
Then, adapt the code in pipeline.py as follows:
import json
from time import sleep
import pandas as pd

from openhexa.sdk import current_run, pipeline, workspace


@pipeline("simple-etl")
def simple_etl():
    people_data = extract_people_data()
    activity_data = extract_activity_data()
    transformed_data = transform(people_data, activity_data)
    load(transformed_data)


@simple_etl.task
def extract_people_data():
    current_run.log_info("Extracting people data...")
    sleep(2)  # Let's pretend we are querying an external system

    return pd.DataFrame([{"id": 1, "first_name": "Mary", "last_name": "Johnson"},
                         {"id": 2, "first_name": "Peter", "last_name": "Jackson"},
                         {"id": 3, "first_name": "Taylor", "last_name": "Smith"}]).set_index("id")


@simple_etl.task
def extract_activity_data():
    current_run.log_info(f"Extracting activity data...")
    with open(f"{workspace.files_path}/activities.json", "r") as activities_file:
        return pd.DataFrame(json.load(activities_file)["activities"]).set_index("id")


@simple_etl.task
def transform(people_data, activity_data):
    current_run.log_info(f"Transforming data...")
    combined_df = activity_data.join(people_data, on="person").reset_index()

    return combined_df


@simple_etl.task
def load(transformed_data):
    current_run.log_info(f"Loading data ({len(transformed_data)} records)")

    output_path = f"{workspace.files_path}/transformed.csv"
    transformed_data.to_csv(output_path)
    current_run.add_file_output(output_path)


if __name__ == "__main__":
    simple_etl()
You can run the pipeline again using python pipeline.py. Looking at the logs outputs, you will notice the Sending output with path... line in the console. This corresponds to the current_run.add_file_output(output_path) call, which has no effect in development mode.
We can, however, look at the output file using cat workspace/transformed.csv.
Let's run this pipeline online. We will need to:
- Upload the
activities.jsonfile in the workspace (Files > Upload files) - Push the new version of the pipeline with
openhexa pipelines push - Run the pipeline using the web interface
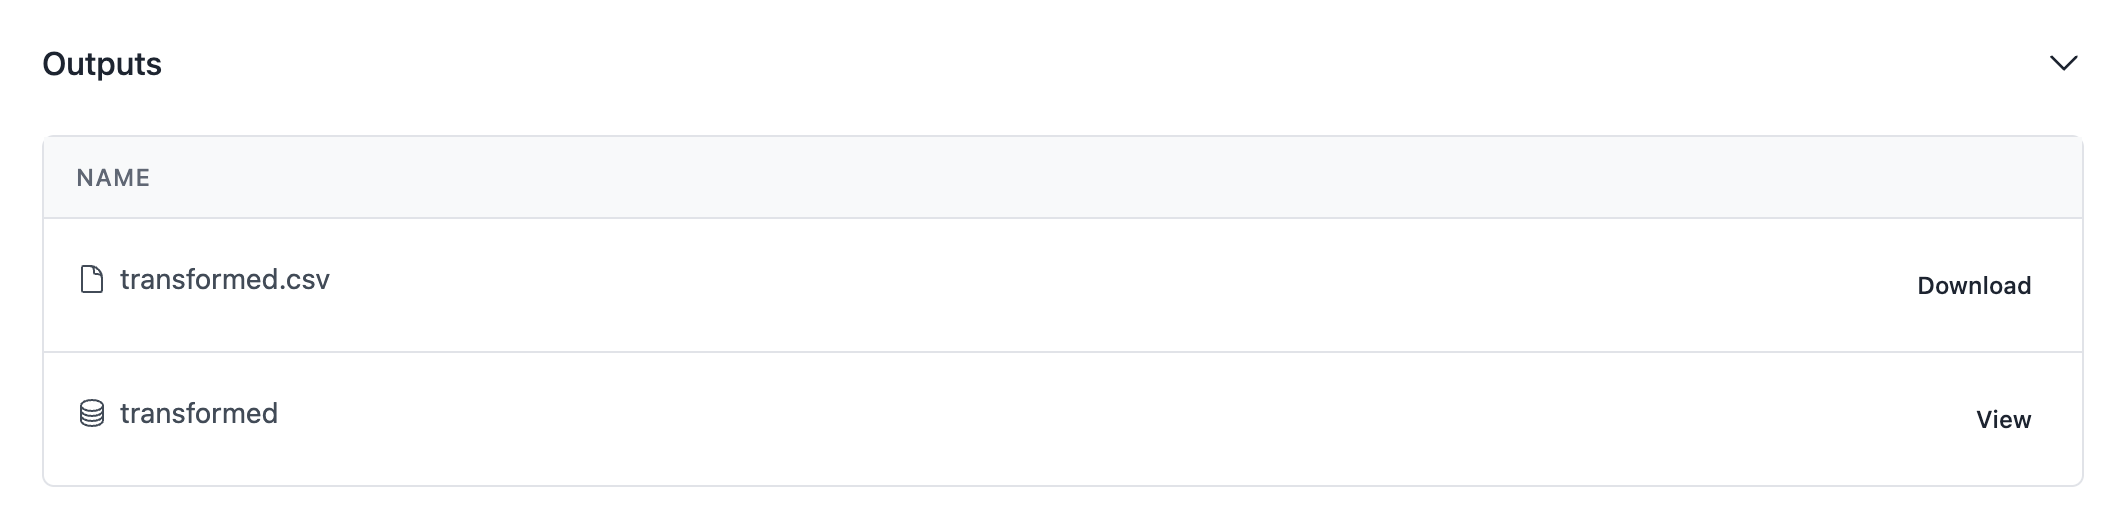
As you can see, your output is now visible in the pipeline run screen!

Using the workspace database
Reading from or writing to the workspace database can also be done using the workspace helper.
The following section will illustrate how to use it in a pipeline, for more information about the workspace database, please refer to the Using the workspace database section of the SDK documentation.
Let's adapt our pipeline to write the transformed data to the workspace database, in addition to storing it as a CSV file.
First, you will need to have an up-and-running Postgres server on your work computer. When you push your pipeline to the Cloud, it will use the actual workspace database, but we need a local database for development (see the official Postgres documentation for installation instructions).
Then, create a database. If you use psql:
Then, adapt you workspace.yaml file with the proper connection parameters in the database section.
You can then change your pipeline code:
import json
from time import sleep
import pandas as pd

from openhexa.sdk import current_run, pipeline, workspace
from sqlalchemy import create_engine, Integer, String


@pipeline("simple-etl")
def simple_etl():
    people_data = extract_people_data()
    activity_data = extract_activity_data()
    transformed_data = transform(people_data, activity_data)
    load(transformed_data)


@simple_etl.task
def extract_people_data():
    current_run.log_info("Extracting people data...")
    sleep(2)  # Let's pretend we are querying an external system

    return pd.DataFrame([{"id": 1, "first_name": "Mary", "last_name": "Johnson"},
                         {"id": 2, "first_name": "Peter", "last_name": "Jackson"},
                         {"id": 3, "first_name": "Taylor", "last_name": "Smith"}]).set_index("id")


@simple_etl.task
def extract_activity_data():
    current_run.log_info(f"Extracting activity data...")
    with open(f"{workspace.files_path}/activities.json", "r") as activities_file:
        return pd.DataFrame(json.load(activities_file)["activities"]).set_index("id")


@simple_etl.task
def transform(people_data, activity_data):
    current_run.log_info(f"Transforming data...")
    combined_df = activity_data.join(people_data, on="person").reset_index()

    return combined_df


@simple_etl.task
def load(transformed_data):
    current_run.log_info(f"Loading data ({len(transformed_data)} records)")

    output_path = f"{workspace.files_path}/transformed.csv"
    transformed_data.to_csv(output_path)
    current_run.add_file_output(output_path)

    engine = create_engine(workspace.database_url)

    # Let's use chunksize to control memory usage, and dtype to avoid weird casting issues
    transformed_data.to_sql("transformed", if_exists="replace", con=engine,
                            chunksize=100, dtype={"id": Integer(), "first_name": String(), "last_name": String()})
    current_run.add_database_output("transformed")


if __name__ == "__main__":
    simple_etl()
Run the pipeline using python pipeline.py, and you can then query your local database:
This example uses the pandas.Dataframe.to_sql method to write data to the workspace database, but you can use any other PostgreSQL-compatible library.
Please refer to the Using the workspace database section of the SDK wiki guide for best practices regarding the workspace database.
If all goes well, you should see the transformed data in the table content.
Let's use openhexa pipelines push once again and run the new pipeline version online. Your run screen should contain an additional output for the transformed table that we have just populated.
Using connections
Please refer to the OpenHEXA SDK documentation for more information about how to use connections in Python, and to the User manual for general information usage about connections.
When developing your pipeline locally, inside the workspace.yaml configuration file you can add multiple connections under the connections section (this workspace.yaml file won't be used online ; the actual connections configured within the workspace will be used instead).
A connection entry can be one of the system listed above or any other, but the process for adding a new connection remains the same. All you have to do is: - Under the connections section, add a new entry by specifiyng the connection name (e.g: dhis2-ex) - Specify the connection type: dhis2, postgres, s3, gcs. Use custom if your external system doesn't belong to that list - Add the required connection parameters
Example of configuration for an PostgreSQL database server:
connections:
  postgres-ex:
      type: postgresql
      host: HOST
      username: USERNAME
      password: PASSWORD
      database_name: DB_NAME
      port: PORT
That's it. Now, inside your pipeline code, you can have access to your Postgres server credentials. Let's modify the previous example and retrieve data from an external Postgres server then store the result inside the embedded workspace database.
import pandas as pd
import psycopg2
import psycopg2.extras

from openhexa.sdk import current_run, pipeline, workspace
from psycopg2 import sql
from sqlalchemy import create_engine


@pipeline("simple-etl")
def simple_etl():
    people_data = extract_people_data()
    activity_data = extract_activity_data()
    transformed_data = transform(people_data, activity_data)
    load(transformed_data)


@simple_etl.task
def extract_people_data():
    current_run.log_info("Extracting people data...")
    return pd.DataFrame(
        [
            {"id": 1, "first_name": "Mary", "last_name": "Johnson"},
            {"id": 2, "first_name": "Peter", "last_name": "Jackson"},
            {"id": 3, "first_name": "Taylor", "last_name": "Smith"},
        ]
    ).set_index("id")


@simple_etl.task
def extract_activity_data():
    current_run.log_info(f"Extracting activity data...")
    postgres_connection = workspace.postgresql_connection("postgres-ex")
    connection = psycopg2.connect(postgres_connection.url)
    with connection.cursor(cursor_factory=psycopg2.extras.RealDictCursor) as cursor:
        cursor.execute(
            sql.SQL("SELECT * FROM {table};").format(
                table=sql.Identifier("user_activities"),
            ),
        )

        return pd.DataFrame(cursor.fetchall()).set_index("id")


@simple_etl.task
def transform(people_data, activity_data):
    current_run.log_info(f"Transforming data...")
    combined_df = activity_data.join(people_data, on="person").reset_index()

    return combined_df


@simple_etl.task
def load(transformed_data):
    current_run.log_info(f"Loading data ({len(transformed_data)} records)")

    output_path = f"{workspace.files_path}/transformed.csv"
    transformed_data.to_csv(output_path, index=False)
    current_run.add_file_output(output_path)

    engine = create_engine(workspace.database_url)
    transformed_data.to_sql("transformed", if_exists="replace", con=engine)
    current_run.add_database_output("transformed")


if __name__ == "__main__":
    simple_etl()
Run the pipeline using python pipeline.py, and you can then query your local database:
Logging messages
You can use the current_run helper to push messages from your pipeline code to the OpenHEXA backend. Those messages will be available in the "Messages" section of your pipeline run in the OpenHEXA web interface.
Sending message can be done using one of the current_run logger methods:
@my_pipeline.task
def my_task():
    current_run.log_debug("1-2 check")
    current_run.log_info("Interesting fact")
    current_run.log_warning("Beware!")
    current_run.log_error("Oops...")
    current_run.log_critical("Red alert!")

    # ... do other stuff
Pipeline parameters
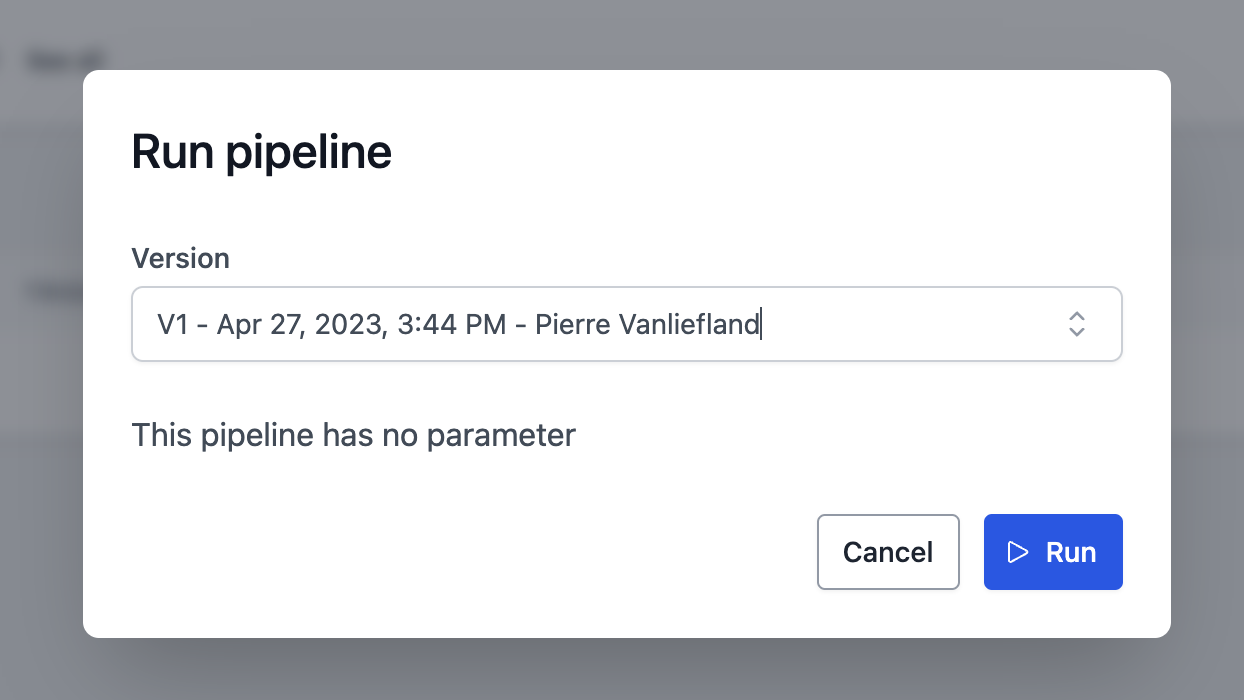
OpenHEXA pipelines can also take parameters. This is especially useful for pipelines that are run manually, using the web interface: users will be able to provide parameters for their pipeline run thanks to an easy-to-use form interface with widgets.
Adding parameter to your pipeline is as simple as decorating your pipeline function with the @parameter decorator.
This decorator requires a code as its first argument: this will be used as the name of the argument passed to the pipeline function.
The @parameter decorator also requires the type keyword argument, which should be either
- A basic Python scalar type (
int,float,strorbool) - an OpenHEXA connection type (
DHIS2Connection,PostgreSQLConnection,IASOConnection...) - an OpenHEXA dataset type (
Dataset) - an OpenHEXA file type (
File) - an OpenHEXA secret type (
Secret) for sensitive values such as tokens or passwords
The following keyword arguments are optional: - name: A human-readable name to be used for the form label in the web interface - help: An additional help text to be displayed in the form - choices: A static list of valid values accepted for the parameter, or a ChoicesFromFile object (or a plain file-path string) to load choices dynamically from a workspace file at run time — see Using dynamic choices from a workspace file - default: an optional default value - required: whether the parameter is required, True by default - widget: enum option for the widget to fill options for the parameter - connection: name of the connection code to be used in the wdiget - multiple whether the arguments should accept a list of values rather than a single value, False by default - disables: a list of parameter codes that should be disabled when this (boolean) parameter is enabled — see Disabling parameters with a toggle
Optional widget field, at the moment DHIS2Widget, IASOWidget are supported. A connection field has to be filled-in to be able to set a widget field.
Adding basic parameter types
Let's modify our pipeline so that it accepts a couple of parameters:
import hashlib
import json
from time import sleep
import pandas as pd

from openhexa.sdk import current_run, pipeline, workspace, parameter
from sqlalchemy import create_engine


@pipeline("simple-etl")
@parameter("user_ids", name="User IDs", type=int, multiple=True)
@parameter(
    "activity_name",
    name="Activity name",
    choices=["Activity 1", "Activity 2", "Activity 3"],
    type=str,
    required=False
)
@parameter("anonymize", name="Anonymize data", help="Hash the user first and last names", type=bool, default=True)
def simple_etl(user_ids, activity_name, anonymize):
    people_data = extract_people_data(user_ids)
    activity_data = extract_activity_data(activity_name)
    transformed_data = transform(people_data, activity_data, anonymize)
    load(transformed_data)


@simple_etl.task
def extract_people_data(user_ids):
    current_run.log_info(f"Extracting people data (ids {','.join(str(uid) for uid in user_ids)})...")
    sleep(2)  # Let's pretend we are querying an external system

    df = pd.DataFrame([{"id": 1, "first_name": "Mary", "last_name": "Johnson"},
                       {"id": 2, "first_name": "Peter", "last_name": "Jackson"},
                       {"id": 3, "first_name": "Taylor", "last_name": "Smith"}])
    df = df[df["id"].isin(user_ids)]

    return df.set_index("id")


@simple_etl.task
def extract_activity_data(activity_name):
    current_run.log_info(f"Extracting activity data ({activity_name if activity_name is not None else 'all'})...")
    with open(f"{workspace.files_path}/activities.json", "r") as activities_file:
        df = pd.DataFrame(json.load(activities_file)["activities"])

    if activity_name is not None:
        df = df[df["activity"] == activity_name]

    return df.set_index("id")


@simple_etl.task
def transform(people_data, activity_data, anonymize):
    current_run.log_info(f"Transforming data ({'anonymized' if anonymize else 'not anonymized'})...")
    combined_df = activity_data.join(people_data, on="person").reset_index()

    combined_df["user"] = combined_df["first_name"] + " " + combined_df["last_name"]
    if anonymize:
        combined_df["user"] = combined_df["user"].apply(lambda u: hashlib.sha256(u.encode("utf-8")).hexdigest())
    combined_df = combined_df.drop(columns=["first_name", "last_name"])

    return combined_df


@simple_etl.task
def load(transformed_data):
    current_run.log_info(f"Loading data ({len(transformed_data)} records)")

    output_path = f"{workspace.files_path}/transformed.csv"
    transformed_data.to_csv(output_path)
    current_run.add_file_output(output_path)

    engine = create_engine(workspace.database_url)
    transformed_data.to_sql("transformed", if_exists="replace", con=engine)
    current_run.add_database_output("transformed")


if __name__ == "__main__":
    simple_etl()
Now that our pipeline accepts parameter, let's run it with a valid configuration. The pipeline runner expects the configuration to be provided as a valid JSON string using the -c argument:
python pipeline.py -c '{"user_ids": [1, 2, 3], "activity_name": "Activity 2"}'
python pipeline.py -c '{"user_ids": [2], "anonymize": false}'
Typing the JSON config manually everytime can be tedious, so the runner also accepts a -f argument that allows you to specify the path to a JSON config file:
echo '{"user_ids": [1, 2, 3], "activity_name": "Activity 2"}' > sample_config.json
python pipeline.py -f sample_config.json
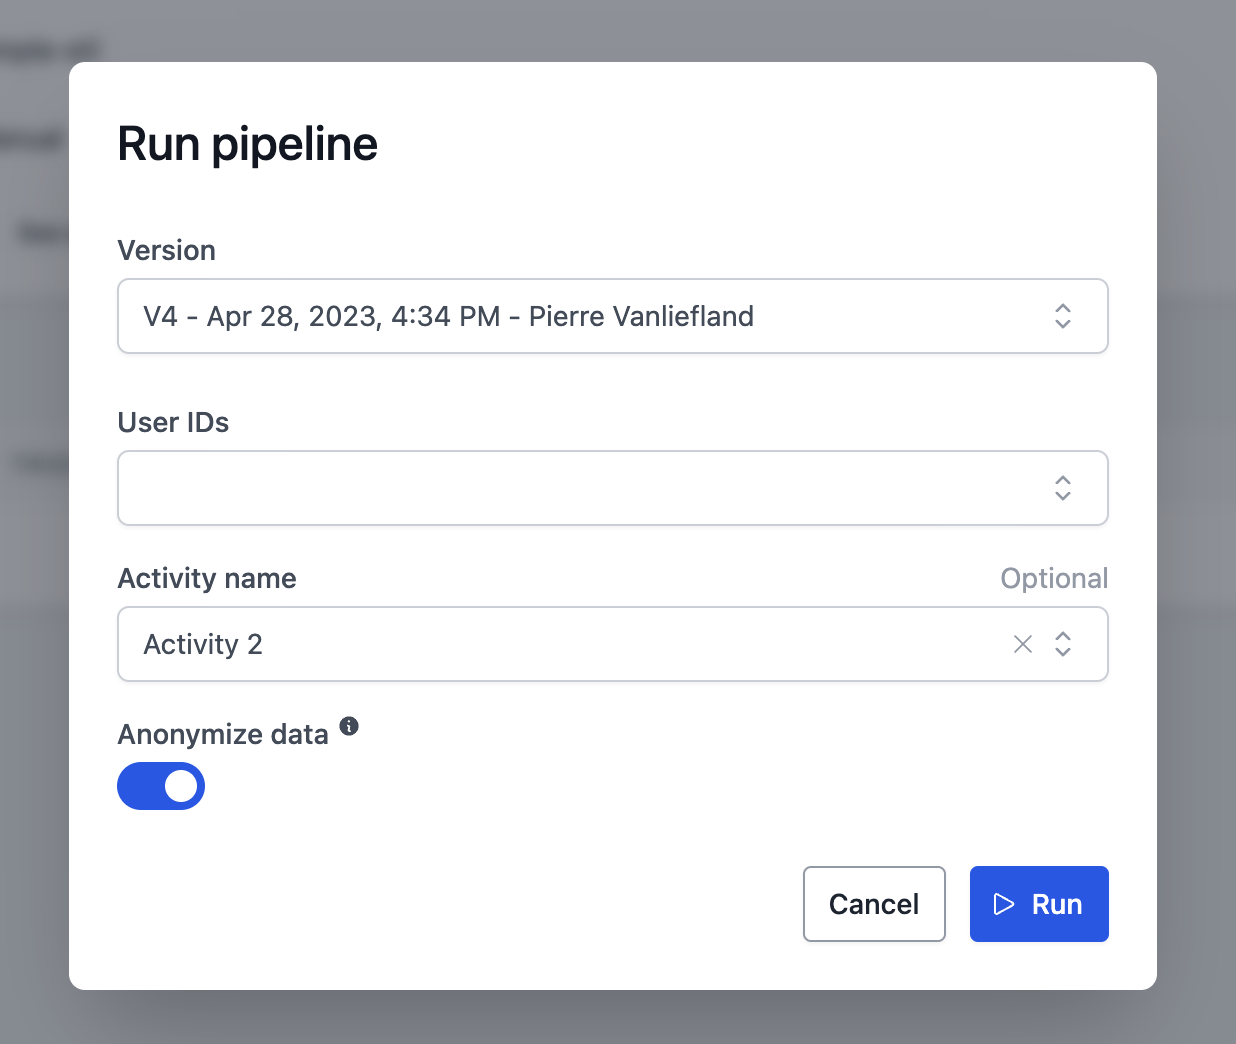
Great! Let's push this pipeline to the cloud so that we can run it with the web interface.
Using dynamic choices from a workspace file
Instead of hardcoding a static list, you can point the choices argument to a file stored in your workspace. OpenHEXA reads the file when the run form is opened and presents its contents as the valid values for the parameter. This is useful when the list of valid values changes over time and you want pipeline users to always see the latest options without pushing a new pipeline version.
To use this feature, import ChoicesFromFile from the SDK:
Then pass a ChoicesFromFile object to choices, or use the shorthand string form with just the file path:
from openhexa.sdk import current_run, parameter, pipeline
from openhexa.sdk.pipelines.parameter import ChoicesFromFile

@pipeline("district-report")
@parameter(
    "district",
    name="District",
    type=str,
    choices=ChoicesFromFile("districts.csv"),
)
def district_report(district):
    current_run.log_info(f"Running report for {district}")
For simple cases, you can also pass the file path as a plain string — it is equivalent to ChoicesFromFile(path="districts.csv"):
The file path is relative to the root of the workspace file system. The file must be present in the workspace when the run form is opened.
Column selection for multi-column files
For files that contain more than one column or key, you must specify which column to use as the source of choices via the column argument:
choices=ChoicesFromFile("regions.csv", column="code")
choices=ChoicesFromFile("regions.json", column="code")
Supported file formats
The format is auto-detected from the file extension (.csv, .json, .yaml, .yml). You can override it with the format argument:
CSV — the file must have a header row:
# Single-column (column auto-detected)
district
Nairobi
Mombasa
Kisumu

# Multi-column (column= required)
code,name
NBI,Nairobi
MSA,Mombasa
JSON / YAML — several shapes are supported:
// Flat array — no column needed
["Nairobi", "Mombasa", "Kisumu"]

// Array of single-key objects — column auto-detected
[{"code": "NBI"}, {"code": "MSA"}]

// Array of multi-key objects — column= required
[{"code": "NBI", "name": "Nairobi"}, {"code": "MSA", "name": "Mombasa"}]

// Object wrapping an array — key auto-detected when there is only one key
{"districts": ["Nairobi", "Mombasa", "Kisumu"]}

// Object wrapping an array — column= required when there are multiple keys
{"codes": ["NBI", "MSA"], "names": ["Nairobi", "Mombasa"]}
Limitations
- The choices file must not exceed 5 MB.
ChoicesFromFileis only compatible with scalar parameter types (str,int,float,bool). It cannot be combined with connection, dataset, file, or secret types.- If the file contains values that are not compatible with the declared parameter type (for example, non-numeric strings for an
intparameter), those options will be disabled in the run form and a warning will be shown.
Disabling parameters with a toggle
While dynamic choices change what values a parameter can take, the disables option changes which parameters are active at all depending on another parameter.
A common case: a pipeline has several mandatory parameters used to process data, but it also offers a "lighter" run mode (for example, regenerating a report from a previous run) that does not need any of them. Without disables, users would have to fill in dummy values for the mandatory parameters just to be able to launch the run.
With disables, you add a boolean parameter that acts as a toggle. When it is enabled, the parameters it lists are:
- hidden/greyed out in the run form,
- exempted from the "required" check,
- omitted from the run config — the pipeline function receives their default value (or
None).
from openhexa.sdk import current_run, parameter, pipeline


@pipeline("snt-report")
@parameter(
    "run_report_only",
    name="Run report only",
    help="Skip data processing and only regenerate the report.",
    type=bool,
    default=False,
    disables=["data_input", "year"],
)
@parameter("data_input", name="Data input", type=str, required=True)
@parameter("year", name="Year", type=int, required=True)
@parameter("report_name", name="Report name", type=str, required=False)
def snt_report(run_report_only, data_input, year, report_name):
    if run_report_only:
        # data_input and year are None here — they were disabled in the form.
        current_run.log_info("Regenerating report only")
        generate_report(report_name)
        return

    process_data(data_input, year)
    generate_report(report_name)
In the run form, ticking Run report only greys out data_input and year and lets the user launch the run without filling them in. report_name is not listed in disables, so it stays editable.
Disabling when the toggle is off (disable_when)
By default the listed parameters are disabled when the toggle is on (disable_when=True). For an "enable" toggle — where the extra parameters should be active only when the toggle is ticked — set disable_when=False:
@parameter(
    "enable_advanced",
    name="Enable advanced options",
    type=bool,
    default=False,
    disables=["batch_size", "threads"],
    disable_when=False,
)
@parameter("batch_size", name="Batch size", type=int, required=True)
@parameter("threads", name="Threads", type=int, required=True)
@pipeline("my-pipeline")
def my_pipeline(enable_advanced, batch_size, threads): ...
Here batch_size and threads are greyed out while Enable advanced options is unticked, and become editable (and required again) once it is ticked.
Rules and behavior
- Only boolean parameters can declare
disables. disable_when(defaultTrue) is the value of the toggle that triggers disabling; it must be a boolean.- A parameter is disabled whenever any toggle whose value matches its
disable_whenlists it (the effect is cumulative if you have several toggles). - A toggle cannot disable itself, and it cannot disable another toggle (chaining is not supported).
- Disabled parameters are validated neither in the web form nor at run time, so a pipeline can run even if a disabled parameter is required and left empty.
Using connection parameter types
When using connection types in parameters, the corresponding connection instance will be automatically passed to your
pipeline function (though the workspace.yaml file when developing locally, and the actual connections configured within when running the pipeline in online).
Connection parameters can be useful when you want to use the same pipeline code in different workspaces, or when you want to be able to run your pipeline with connections for test environments.
Note that connection parameter types do not support the multiple and choices arguments.
Let's adapt our previous pipeline so that it uses a PostgreSQLConnection parameter type:
import hashlib
import json
from time import sleep
import pandas as pd

from openhexa.sdk import current_run, pipeline, workspace, parameter, PostgreSQLConnection
from sqlalchemy import create_engine


@pipeline("simple-etl")
@parameter("user_ids", name="User IDs", type=int, multiple=True)
@parameter(
    "activity_name",
    name="Activity name",
    choices=["Activity 1", "Activity 2", "Activity 3"],
    type=str,
    required=False
)
@parameter("anonymize", name="Anonymize data", help="Hash the user first and last names", type=bool, default=True)
@parameter("postgres_connection", name="Postgres Connection identifier", type=PostgreSQLConnection, required=True)
def simple_etl(user_ids, activity_name, anonymize, postgres_connection):
    people_data = extract_people_data(user_ids)
    activity_data = extract_activity_data(activity_name)
    transformed_data = transform(people_data, activity_data, anonymize)
    load(transformed_data, postgres_connection)

### (shortened, see previous example for the extract_people_data, extract_activity_data and transform tasks)

@simple_etl.task
def load(transformed_data, postgres_connection):
    current_run.log_info(f"Loading data ({len(transformed_data)} records)")

    output_path = f"{workspace.files_path}/transformed.csv"
    transformed_data.to_csv(output_path)
    current_run.add_file_output(output_path)

    engine = create_engine(postgres_connection.url)
    transformed_data.to_sql("transformed", if_exists="replace", con=engine)
    current_run.add_database_output("transformed")


if __name__ == "__main__":
    simple_etl()
You can deploy your updated pipeline using openhexa pipelines push.
When running the pipeline using the web interface, you can now select the PostgreSQL connection to use:
Using parameters with widget and connection fields
Widget field improves user experience to configure pipeline parameter with an external source. We offer list of available widgets as enumeration optons. Currently OpenHexa supports :
DHIS2Widget:ORG_UNITS,ORG_UNIT_GROUPS,ORG_UNIT_LEVELS,DATASETS,DATA_ELEMENTS,DATA_ELEMENT_GROUPS,INDICATORS,INDICATOR_GROUPSIASOWidget:IASO_ORG_UNITS,IASO_FORMS,IASO_PROJECTSBy specifying the appropriate widget name, we inform the backend where to fetch the data from and the frontend which UI element to render. This requires defining a connection to be used alongside the widget field.
Let's configure a pipelines that is using list of DHIS2 ORG_UNITS in the culculations:
from openhexa.sdk.pipelines import current_run, parameter, pipeline, task
from openhexa.sdk.workspaces.connection import DHIS2Connection
from openhexa.sdk.pipelines.parameter import DHIS2Widget

@pipeline("dhis2-pipeline")
@parameter("dhis2_connection", name="DHIS2Connection", type=DHIS2Connection, required=True)
@parameter("org_units", name="Organization units", type=str, multiple=True, required=True, widget=DHIS2Widget.ORG_UNITS, connection="dhis2_connection", help="Auto-filled form DHIS2")
def calculate_dhis2_units(dhis2_connection, org_units):
    get_data_for_each_org_units(org_units)

@calculate_dhis2_units.task
def get_data_for_each_org_unit(org_units):
    for org_unit in org_units:
        #fetch org unit data and do some calculations
        current_run.log_info(f"Org units: {org_units}")
        ...
DHIS2Widget, which fetches its options from the specified DHIS2Connection 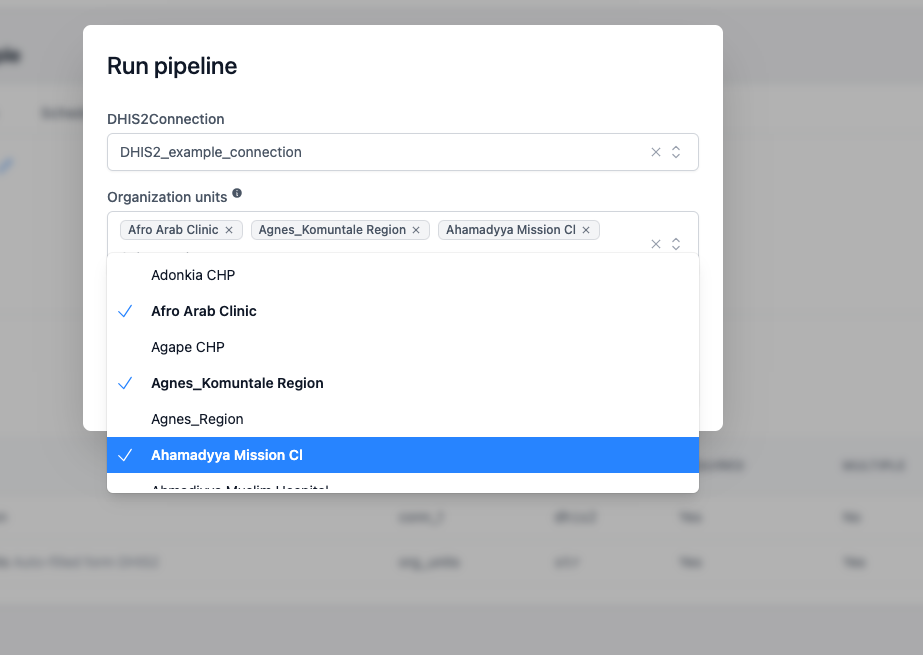
Using datasets parameters
Datasets are a great way to expose data to other users and to version your data. When you develop your pipeline, you may want to let users select which datasets to use to get/save data. In order to add a dataset parameter to you pipeline, you can use the @parameter decorator.
from openhexa.sdk import current_run, pipeline, workspace, parameter, Dataset

@pipeline("simple-etl")
@parameter("my_dataset", name="Input Dataset", type=Dataset)
def my_pipeline(my_dataset):
    # ... do stuff with my_dataset
    print(my_dataset.slug)
Please refer to OpenHEXA SDK documentation for more information on how to use datasets.
Using file parameters
The file parameter allows users to select a file from the workspace or upload a file as an input parameter of a pipeline.
from openhexa.sdk import File, current_run, parameter, pipeline

@pipeline("file-browser-example")
@parameter("input_file", name="Select a file", type=File, required=True)
def file_browser_widget(input_file):
    current_run.log_info(input_file)
    current_run.log_info(input_file.name)
    current_run.log_info(input_file.path)

    try:
        current_run.log_info(f"Reading file {input_file.path}")
        df = pd.read_csv(input_file.path)
        current_run.log_info("First few rows of the CSV file:")
        current_run.log_info(df.head().to_string())
    except Exception as e:
        current_run.log_info(f"Error reading CSV file: {str(e)}")

if __name__ == "__main__":
    file_browser_example()
The creator of the pipeline can also optionally restrict the file selection to a specific folder by using the directory argument. An example:
@parameter("input_file_restricted", name="Select a file (restricted)", type=File, directory="my-folder")
In this case both the browsing as well as searching will be restricted to folder my-folder. A nested folder can also be specified here. In case the folder does not exist, the directory parameter will be ignored and the user can freely select and search files.
Using secret parameters
The Secret parameter type is used for sensitive values such as API tokens, passwords or other credentials that should not be displayed in clear text. When a parameter is declared with type=Secret, the value is hidden in the OpenHEXA web interface (the input is masked and the value is not shown in pipeline run summaries).
At runtime, the pipeline function receives the value as a plain str, so you can use it like any other string.
from openhexa.sdk import current_run, parameter, pipeline
from openhexa.sdk.pipelines.parameter import Secret

@pipeline("secret-example")
@parameter("iaso_token", name="IASO token", type=Secret, required=True)
def secret_example(iaso_token):
    current_run.log_info("Calling the external API with the provided token...")
    # use `iaso_token` as a regular string, e.g. in an Authorization header
    # ...

if __name__ == "__main__":
    secret_example()
Note that the Secret parameter type does not support the multiple and choices arguments, and empty values are rejected.
Listing and deleting pipelines
To help you manage your workspace pipelines, the CLI provides two useful commands:
openhexa pipelines list, which displays all the pipelines within the current workspacesopenhexa pipelines delete <code>(the CLI will ask you for confirmation before deleting the pipeline)
Scheduling and parameters
OpenHEXA allows you to schedule pipelines so that they run automatically at predefined intervals.
A pipeline can only be scheduled if all its parameters are optional, a parameter is optional if: - required is False - required is True and default is not None (it has a default value set)
Triggering pipelines using a webhook
OpenHEXA pipelines can be triggered using a webhook. This is useful when you want to trigger a pipeline from an external system, or when you want to trigger a pipeline from a system that doesn't have access to the OpenHEXA web interface.
From the web interface, on the page of a pipeline, you can enable and then find the webhook URL in the "Webhook" section. You can then use this URL to trigger the pipeline from an external system.
Example using curl:
curl -X POST -H "Content-Type: application/json" -d '{"user_ids": [1, 2, 3], "activity_name": "Activity 2"}' https://your-openhexa-instance.com/pipelines/201e39f6-4fca-4f86-8d81-61b05f646d55/run
Running the pipeline using Docker
This feature requires Docker to be installed on your computer
If you want to launch a pipeline on your computer and use an environment that is similar to the cloud environment, you can use the openhexa pipelines run command.
This command will download the OpenHEXA pipelines Docker image, launch a container and run your pipeline code within it.
Just as when using python my_pipeline.py, you can use -c of -f to specify the pipeline run config:
openhexa pipelines run some_dir/my_pipeline.py -c '{"user_ids": [1, 2, 3], "activity_name": "Activity 2"}'
openhexa pipelines run some_dir/my_pipeline.py -f sample_config.json
You can omit the path to the pipeline file if you are in a directory that contains a pipeline.py file.
By default, this command will run the pipeline using the blsq/openhexa-blsq-environment:latest image (which is also the image used in the OpenHEXA Jupyter environment).
You can specify another image (or tag) in one of the two following ways:
- Using the
--imageoption (openhexa pipelines run some_dir/my_pipeline.py --image your-org/your-image:sometag) - Using the
imagekey in yourworkspace.yamlfile
Debugging and troubleshooting your pipelines
In order to help you debug your pipelines, the OpenHEXA SDK provides a few tools: - The current_run helper, which allows you to log messages to the OpenHEXA backend - A debug mode that can be enabled when running your pipeline locally
To run your pipeline in debug mode, you can use the -d flag:
This will run your pipeline in debug mode. The pipeline run will wait for a debugpy client to connect on localhost:5678. You can then use VSCode to launch the debugger via the "Run and Debug" panel to continue the execution of the run. You can then open your pipeline.py file and add breakpoints to pause the execution of your pipeline at specific points.
If you don't have a debugging configuration in VSCode, you can create one in .vscode/launch.json using this snippet:
{
  "version": "0.2.0",
  "configurations": [
    {
      "name": "Debug OpenHEXA pipeline",
      "type": "debugpy",
      "request": "attach",
      "connect": {
        "host": "localhost",
        "port": 5678
      },
      "pathMappings": [
        {
          "localRoot": "${workspaceFolder}",
          "remoteRoot": "/home/hexa/pipeline"
        }
      ],
      "subProcess": true
    }
  ]
}
Example:
https://github.com/BLSQ/openhexa/assets/1607549/7a40076d-ee0b-4c54-af01-9c0e71572e80
Recipes
Using Papermill
Papermill allows you to parameterize and run Jupyter notebooks programmatically.
If you want to convert a notebook to a pipeline, or run a specific notebook as part of a Python pipeline, you can simply use the Papermill execute_notebook function:
import os.path
from datetime import timezone

from openhexa.sdk import current_run, pipeline, workspace
from datetime import datetime
import papermill as pm


@pipeline("with-papermill")
def with_papermill():
    run_notebook()


@with_papermill.task
def run_notebook():
    current_run.log_info("Launching the notebook...")
    input_path = os.path.join(os.path.dirname(os.path.abspath(__file__)), "simple_notebook.ipynb")
    output_path = f"{workspace.files_path}/simple_notebook_output_{datetime.now(timezone.utc).isoformat()}.ipynb"
    pm.execute_notebook(
        input_path=input_path,
        output_path=output_path,
        parameters={"param_1": "value_1", "param_2": False},
        # The next parameter is important - otherwise papermill will perform a lot of small append write operations,
        # which can be very slow when using object storage in the cloud
        request_save_on_cell_execute=False,
        progress_bar=False
    )
    current_run.log_info("Done!")


if __name__ == "__main__":
    with_papermill()